Vilhelm Gafvelin
Engine Programmer
My Portfolio Piece
Introduction:
Greetings! My name is Vilhelm Gafvelin.
I am a student at the Game Assembly in Stockholm.
At school, I am a member of team Catnap as an engine programmer.
We have developed Kitty Engine as a means of developing our
game projects, and my portfolio piece is focused on extending
Kitty Engine with new functionality.
The Mission:
I wanted to extend Kitty Engine with a scripting option to write
game code. Naturally, I went with Lua.
Lua is an elegant and lightweight scripting language which is easy to learn
and easy to use. Most importantly; Lua is very performant, especially
for a scripting language.
The Plan:
To facilitate game development in Lua, I needed to develop some tools.
Firstly, I wanted an in-engine text editor. This would allow me to easily test Lua code.
Secondly, I needed to integrate Lua scripts into our component system.
Thirdly, I needed to develop a scripting API.
To enable all of this, I made use of the immaculate Lua-C++ binding Sol, which has
made working on my portfolio piece an utter joy:
https://github.com/ThePhD/sol2
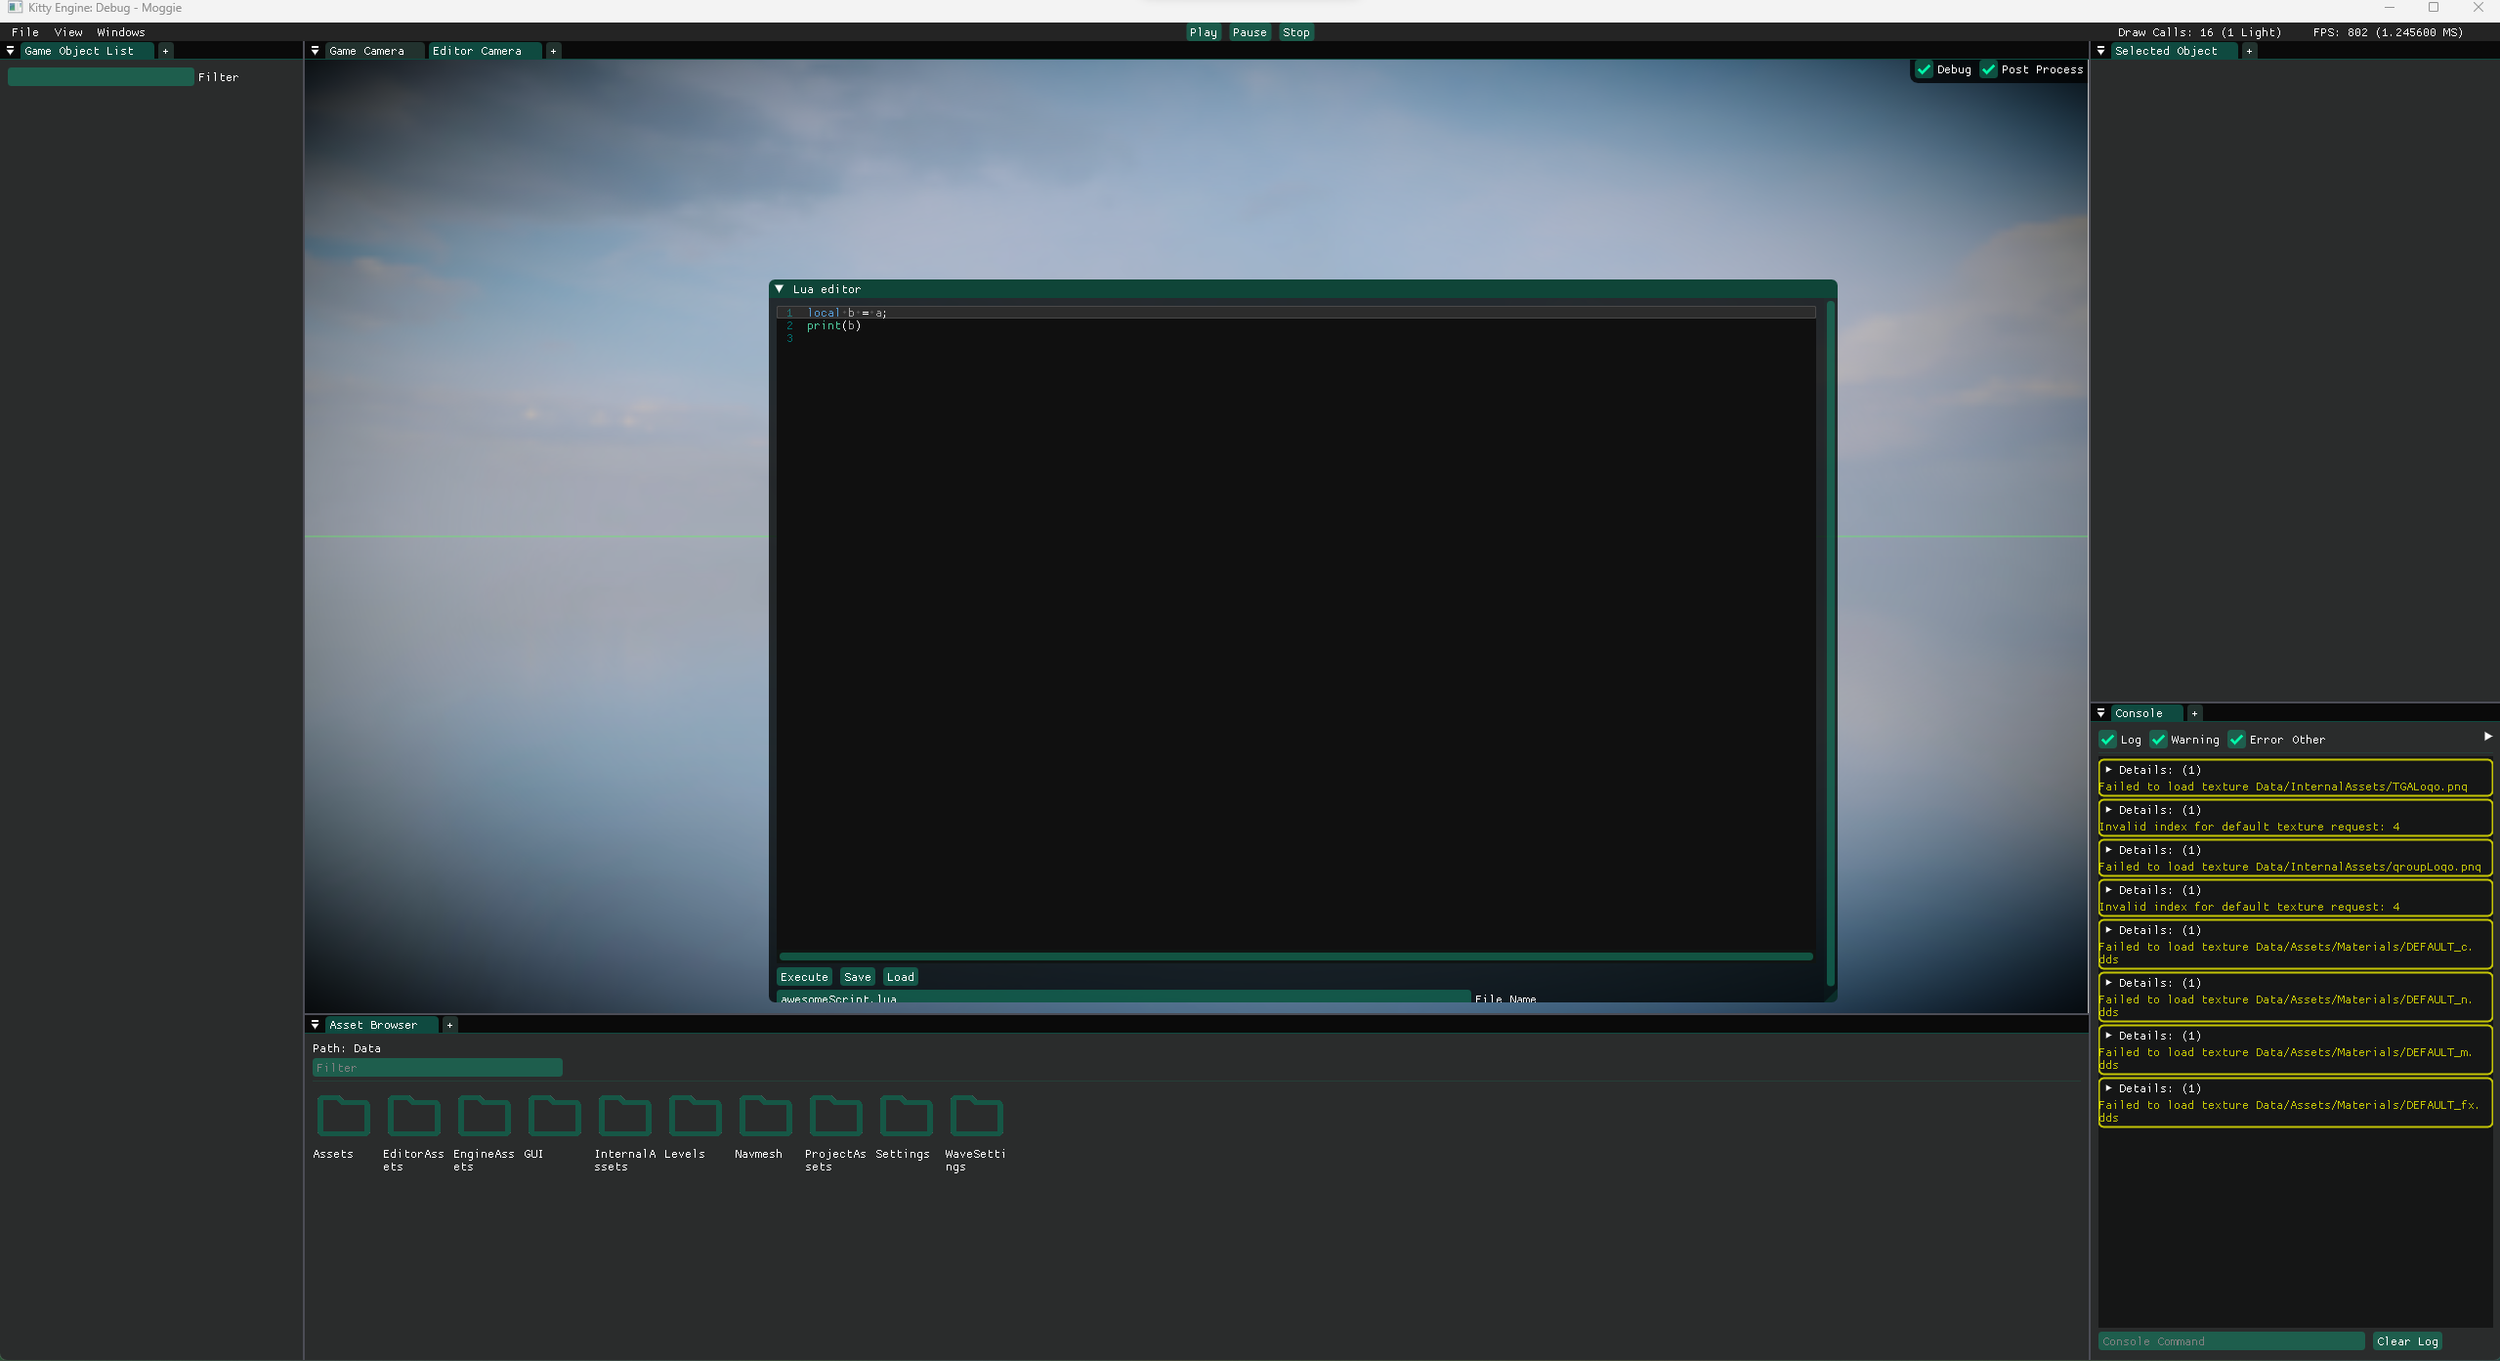
Step 1: Hello, Kitty Engine!
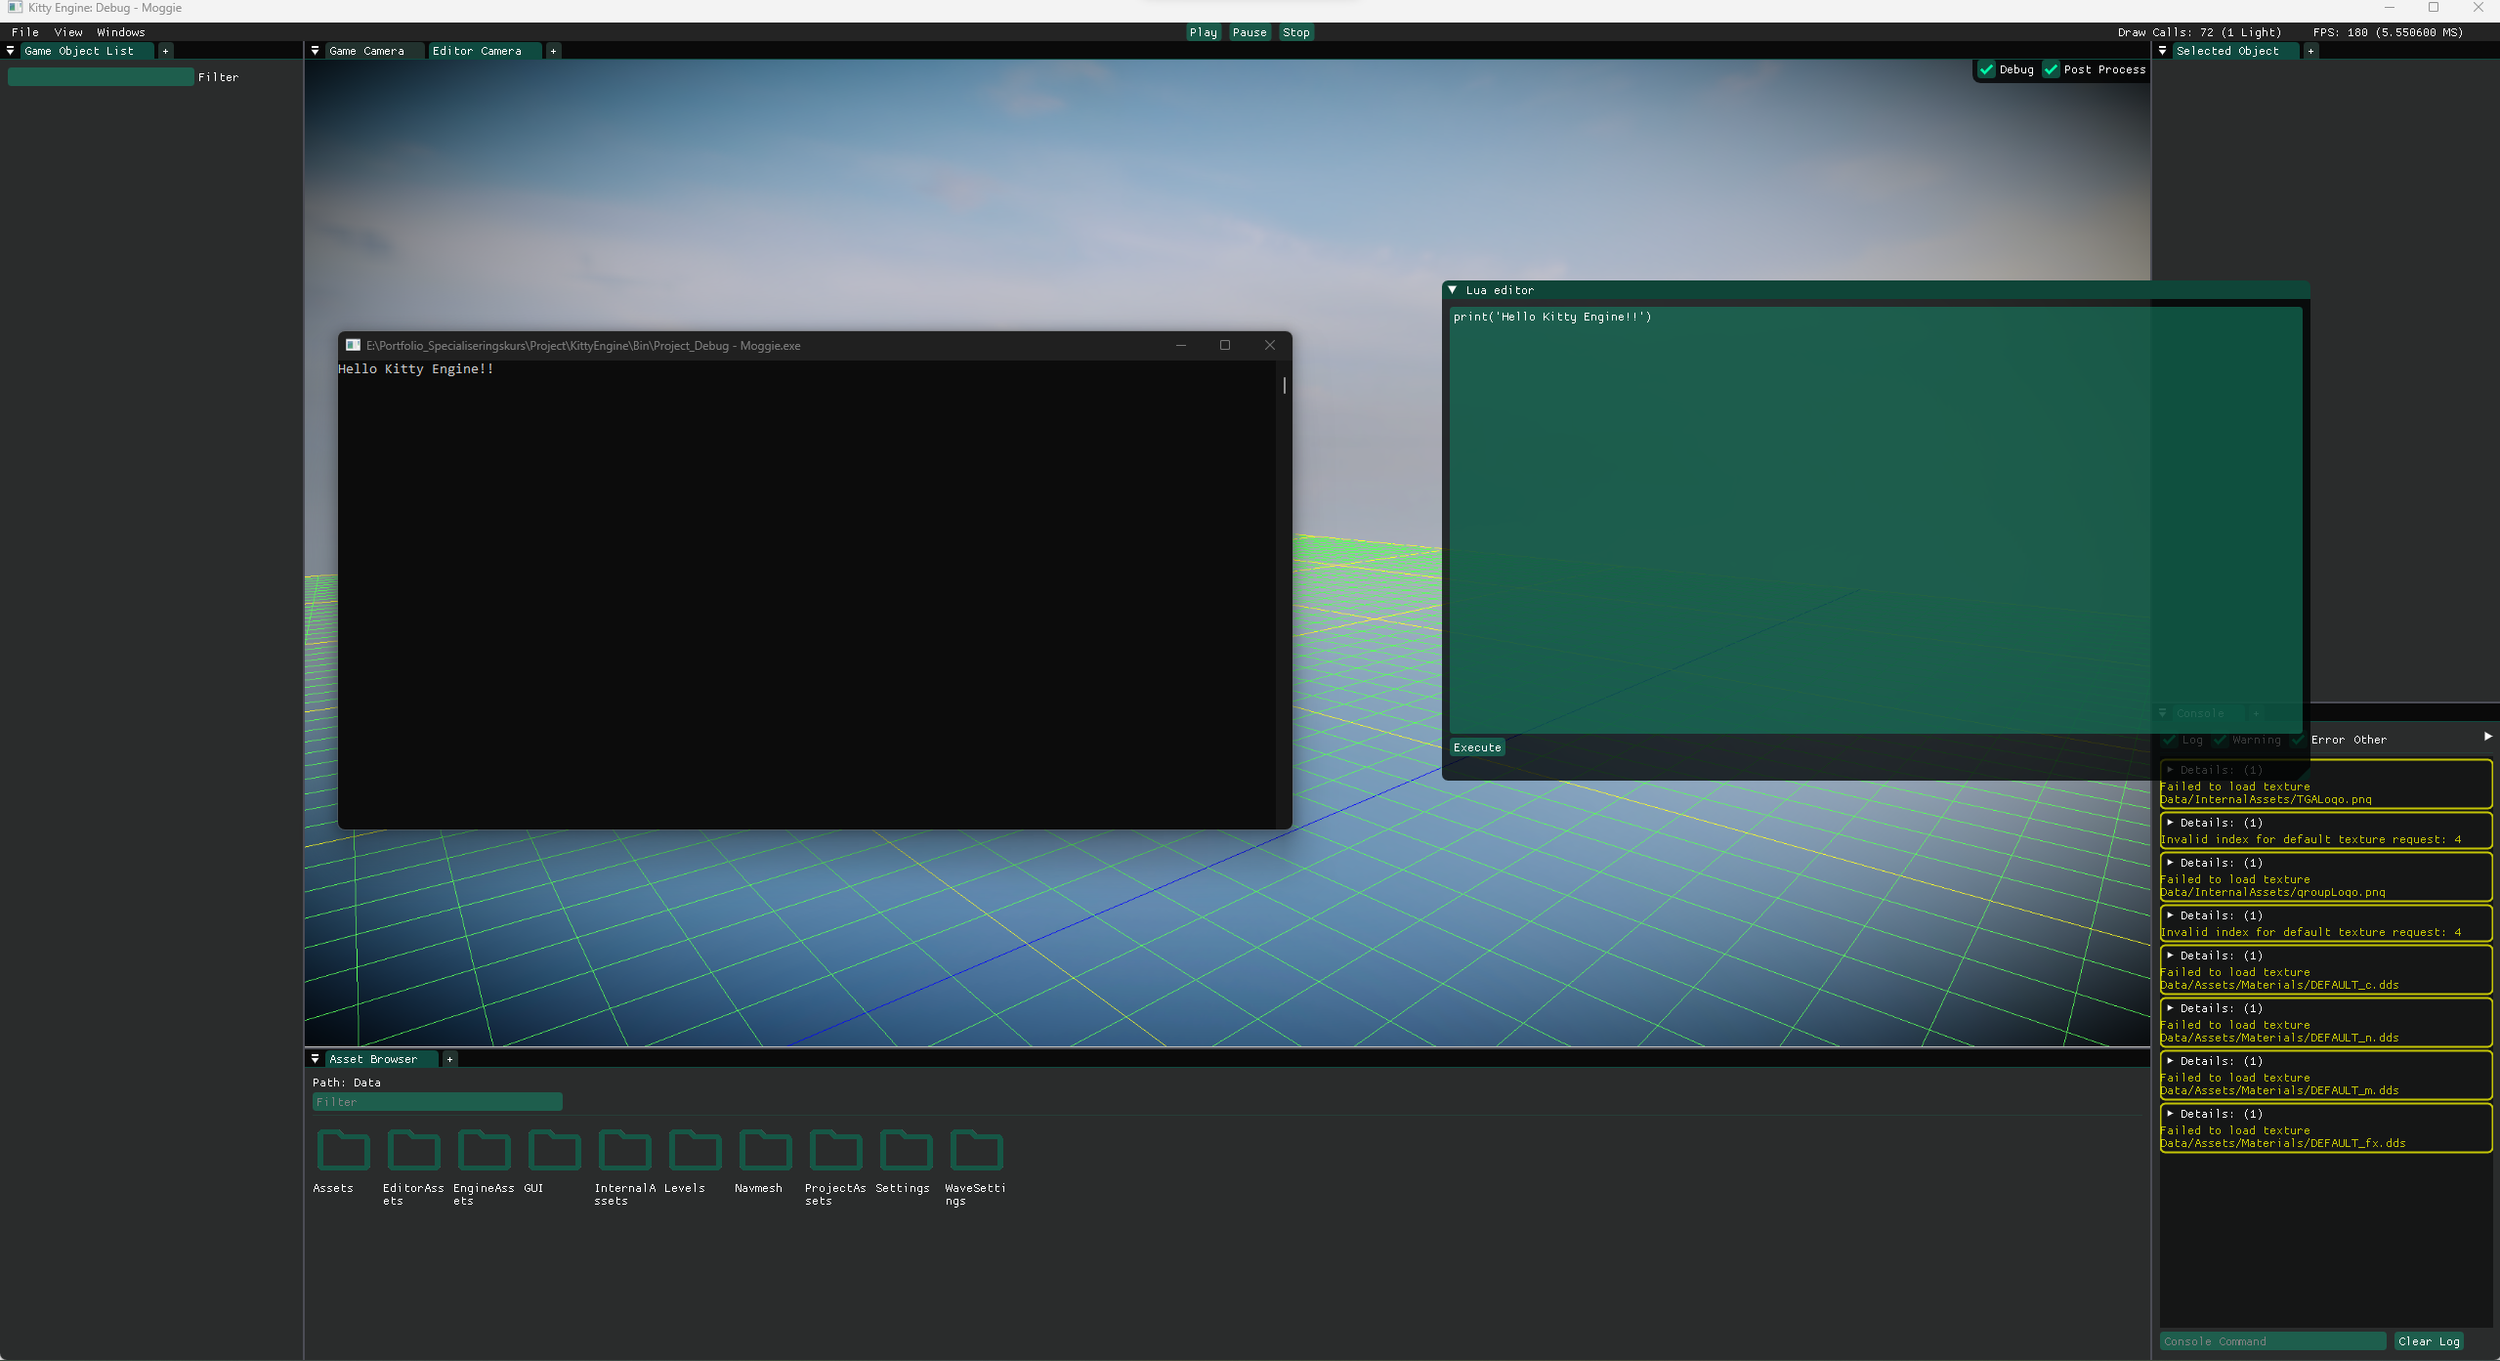
At this point Lua was already up and running, but the environment was far from complete.
There was no error handling except for the default handler, which just throws
an error and crashes the whole program if it encounters a Lua error.
Also, there was no scripting API yet, so the most I could do at this point was mess about
with tables and print to stdout.
There was no serialization or deserialization of scripts either.
Despite the austerity of this humble environment I had set up, Lua was still technically already integrated,
and the rest of the pieces soon fell into place.
Step 2: User defined datatypes
If we want to create a useful scripting API, we’ll of course need to support
custom data types. More importantly, we need to expose custom datatypes from C++.
We don’t need to expose our entire component system in one fell swoop though.
Let’s take it one step at a time, and expose a simple struct consisting of 2 ints:
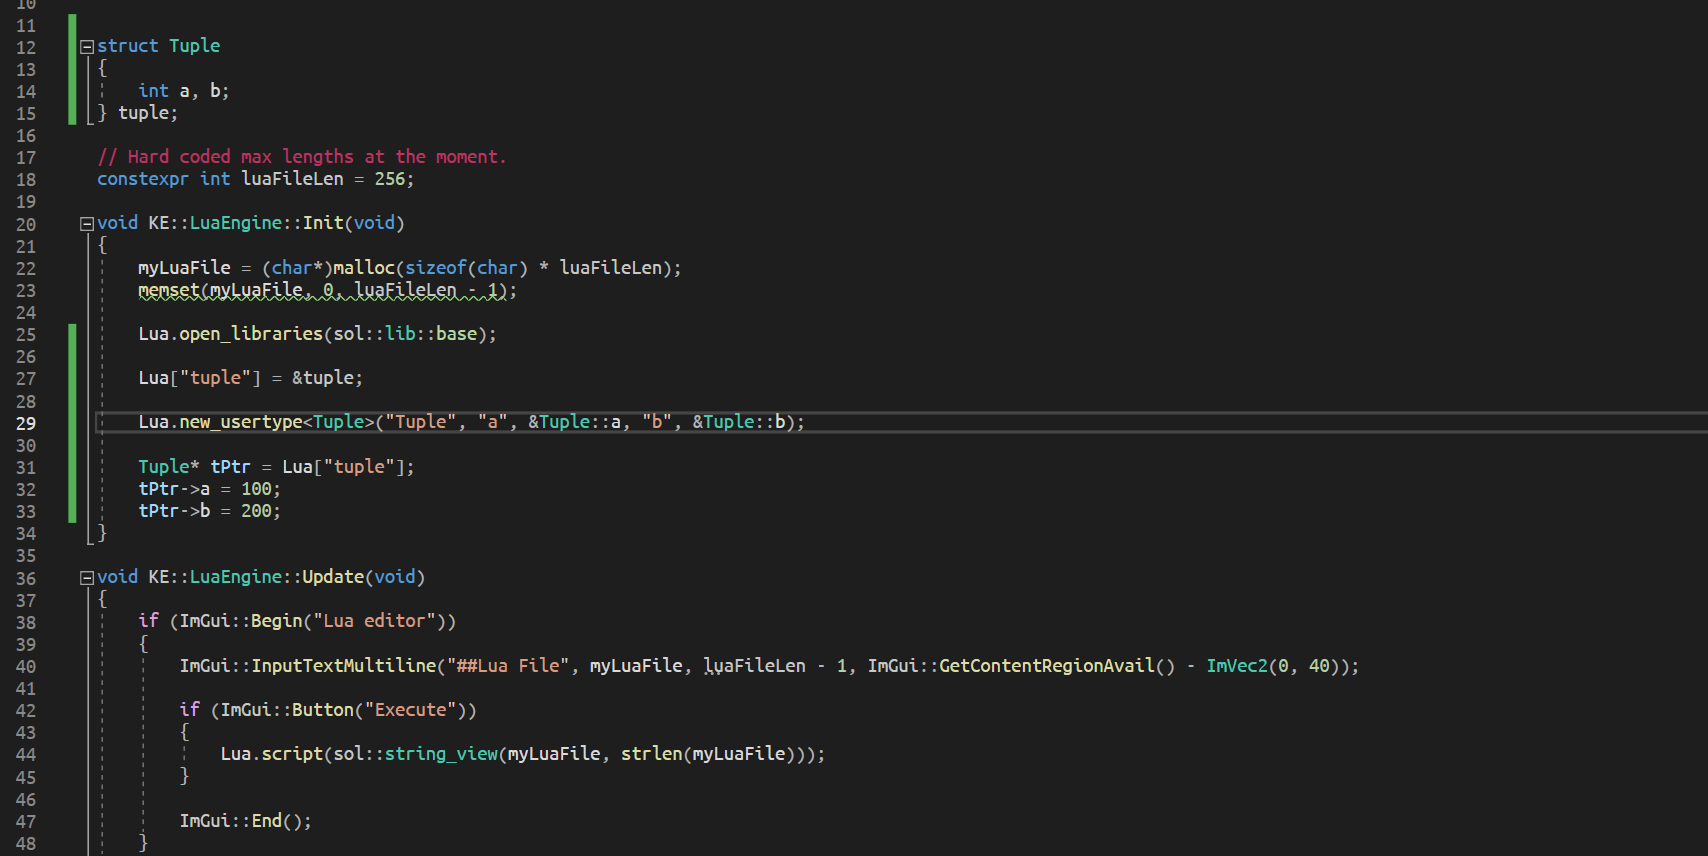
As we can see, we have a struct called Tuple.
We’re only interested in treating it as POD at this point, methods will come later.
Here we can also see the flexibility and ease-of-use of Sol.
Our tuple is a global instance, and after opening Lua’s libs we bind our global instance.
Then, we create a new user type for our tuple, which in this case involves just
exposing the members.
Finally, we showcase Sol’s ability to get our bound variables by getting a pointer
to our tuple (we can just directly modify the global instance of course, but I just thought it was
worth it to showcase this feature of Sol).
Using this pointer, we set the values in C++, but will this be reflected in Lua?

The answer is yes!
The instance’s members are accessible from Lua, and their values are correct.
We can of course change this instance’s values from Lua and it will be reflected in C++,
so this communication isn’t merely one-way.
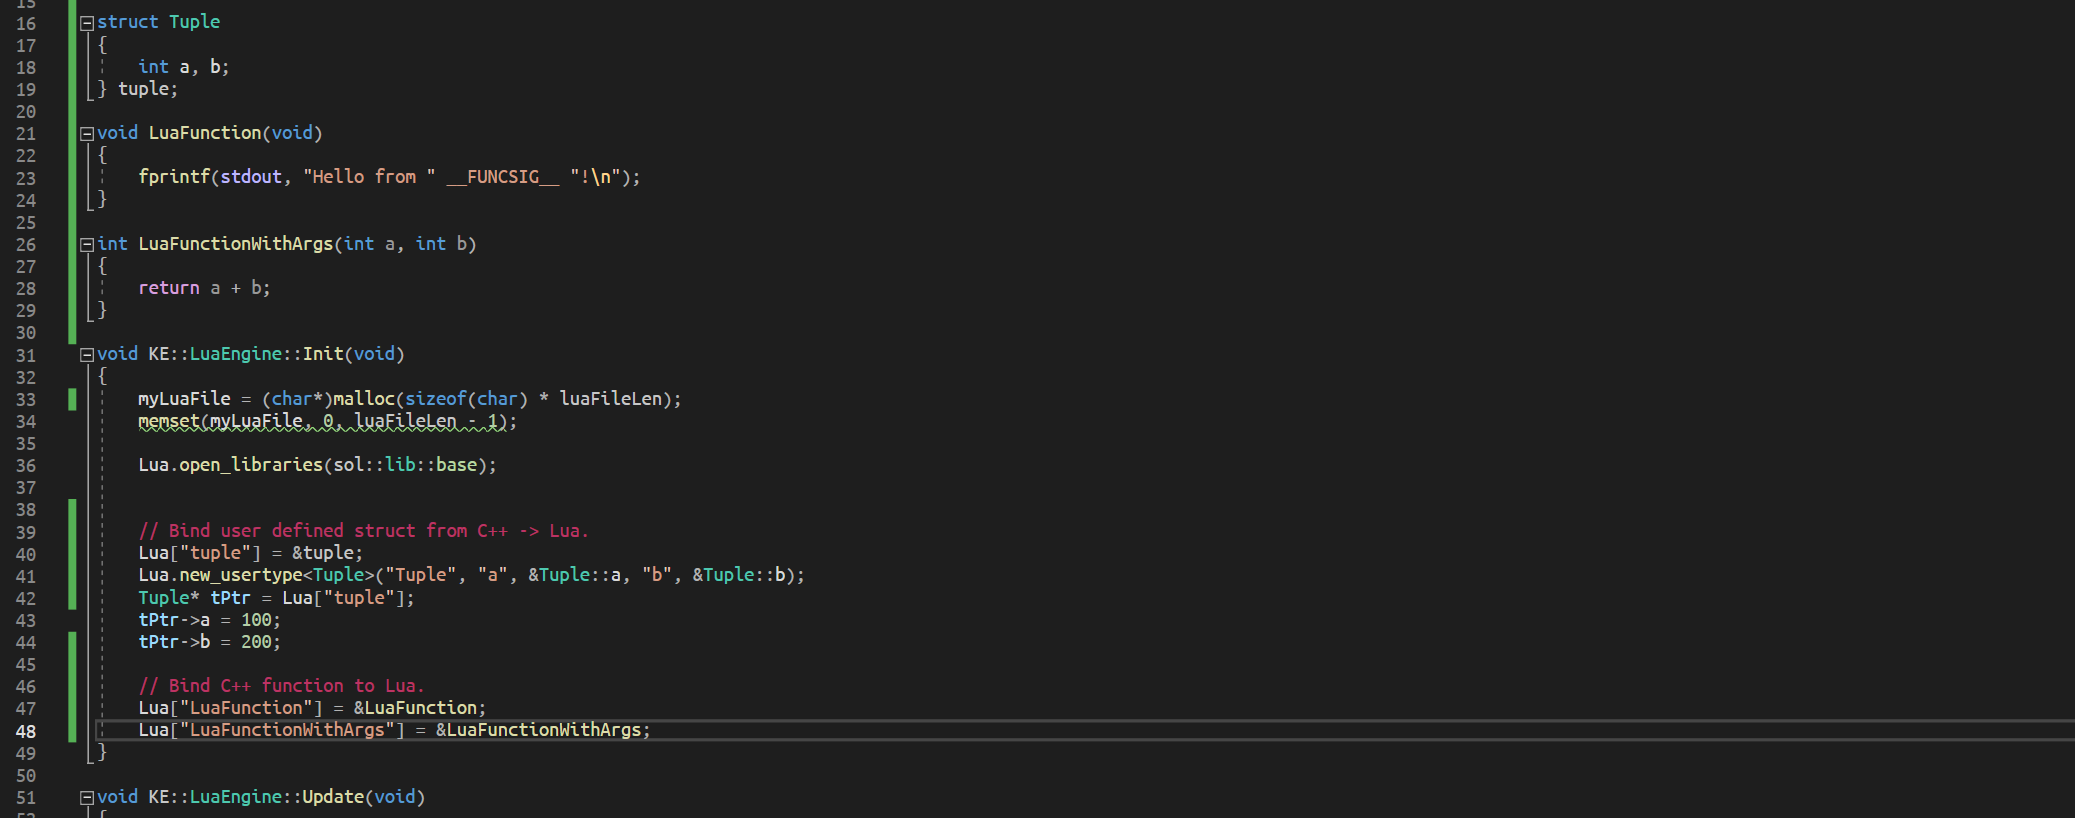
Step 3: Running C++ functions in Lua
Exposing user defined datatypes is all well and good, but we want to
expose functions too.
Luckily, Sol makes this just as easy:
And here is the result in-engine:

Step 4: Serialization, deserialization
and a pretty text editor.
At this point we have implemented quite a few things, and the integration
is starting to take shape.
Now, I would like to serialize and deserialize Lua files from/to disk.
I would also like a proper text editor, because a default Dear ImGUI-textbox
doesn’t feature syntax highlighting, and tab switches focus to the execute-button instead of
inserting a tab in the textbox.
My good friend and Catnap teammate Assar Bergh helped me with both.
In one fell swoop, he added an editor window and added serialization/deserialization to
the bin folder (a huge thank you for the help!).
The editor window was made using ImGUIColorTextEdit:
https://github.com/BalazsJako/ImGuiColorTextEdit
which Assar had already integrated into Kitty Engine.
After his help, I just moved the serialization/deserialization target to a scripts folder
in Kitty Engine’s assets folder to have everything organized, and then
this step was over.

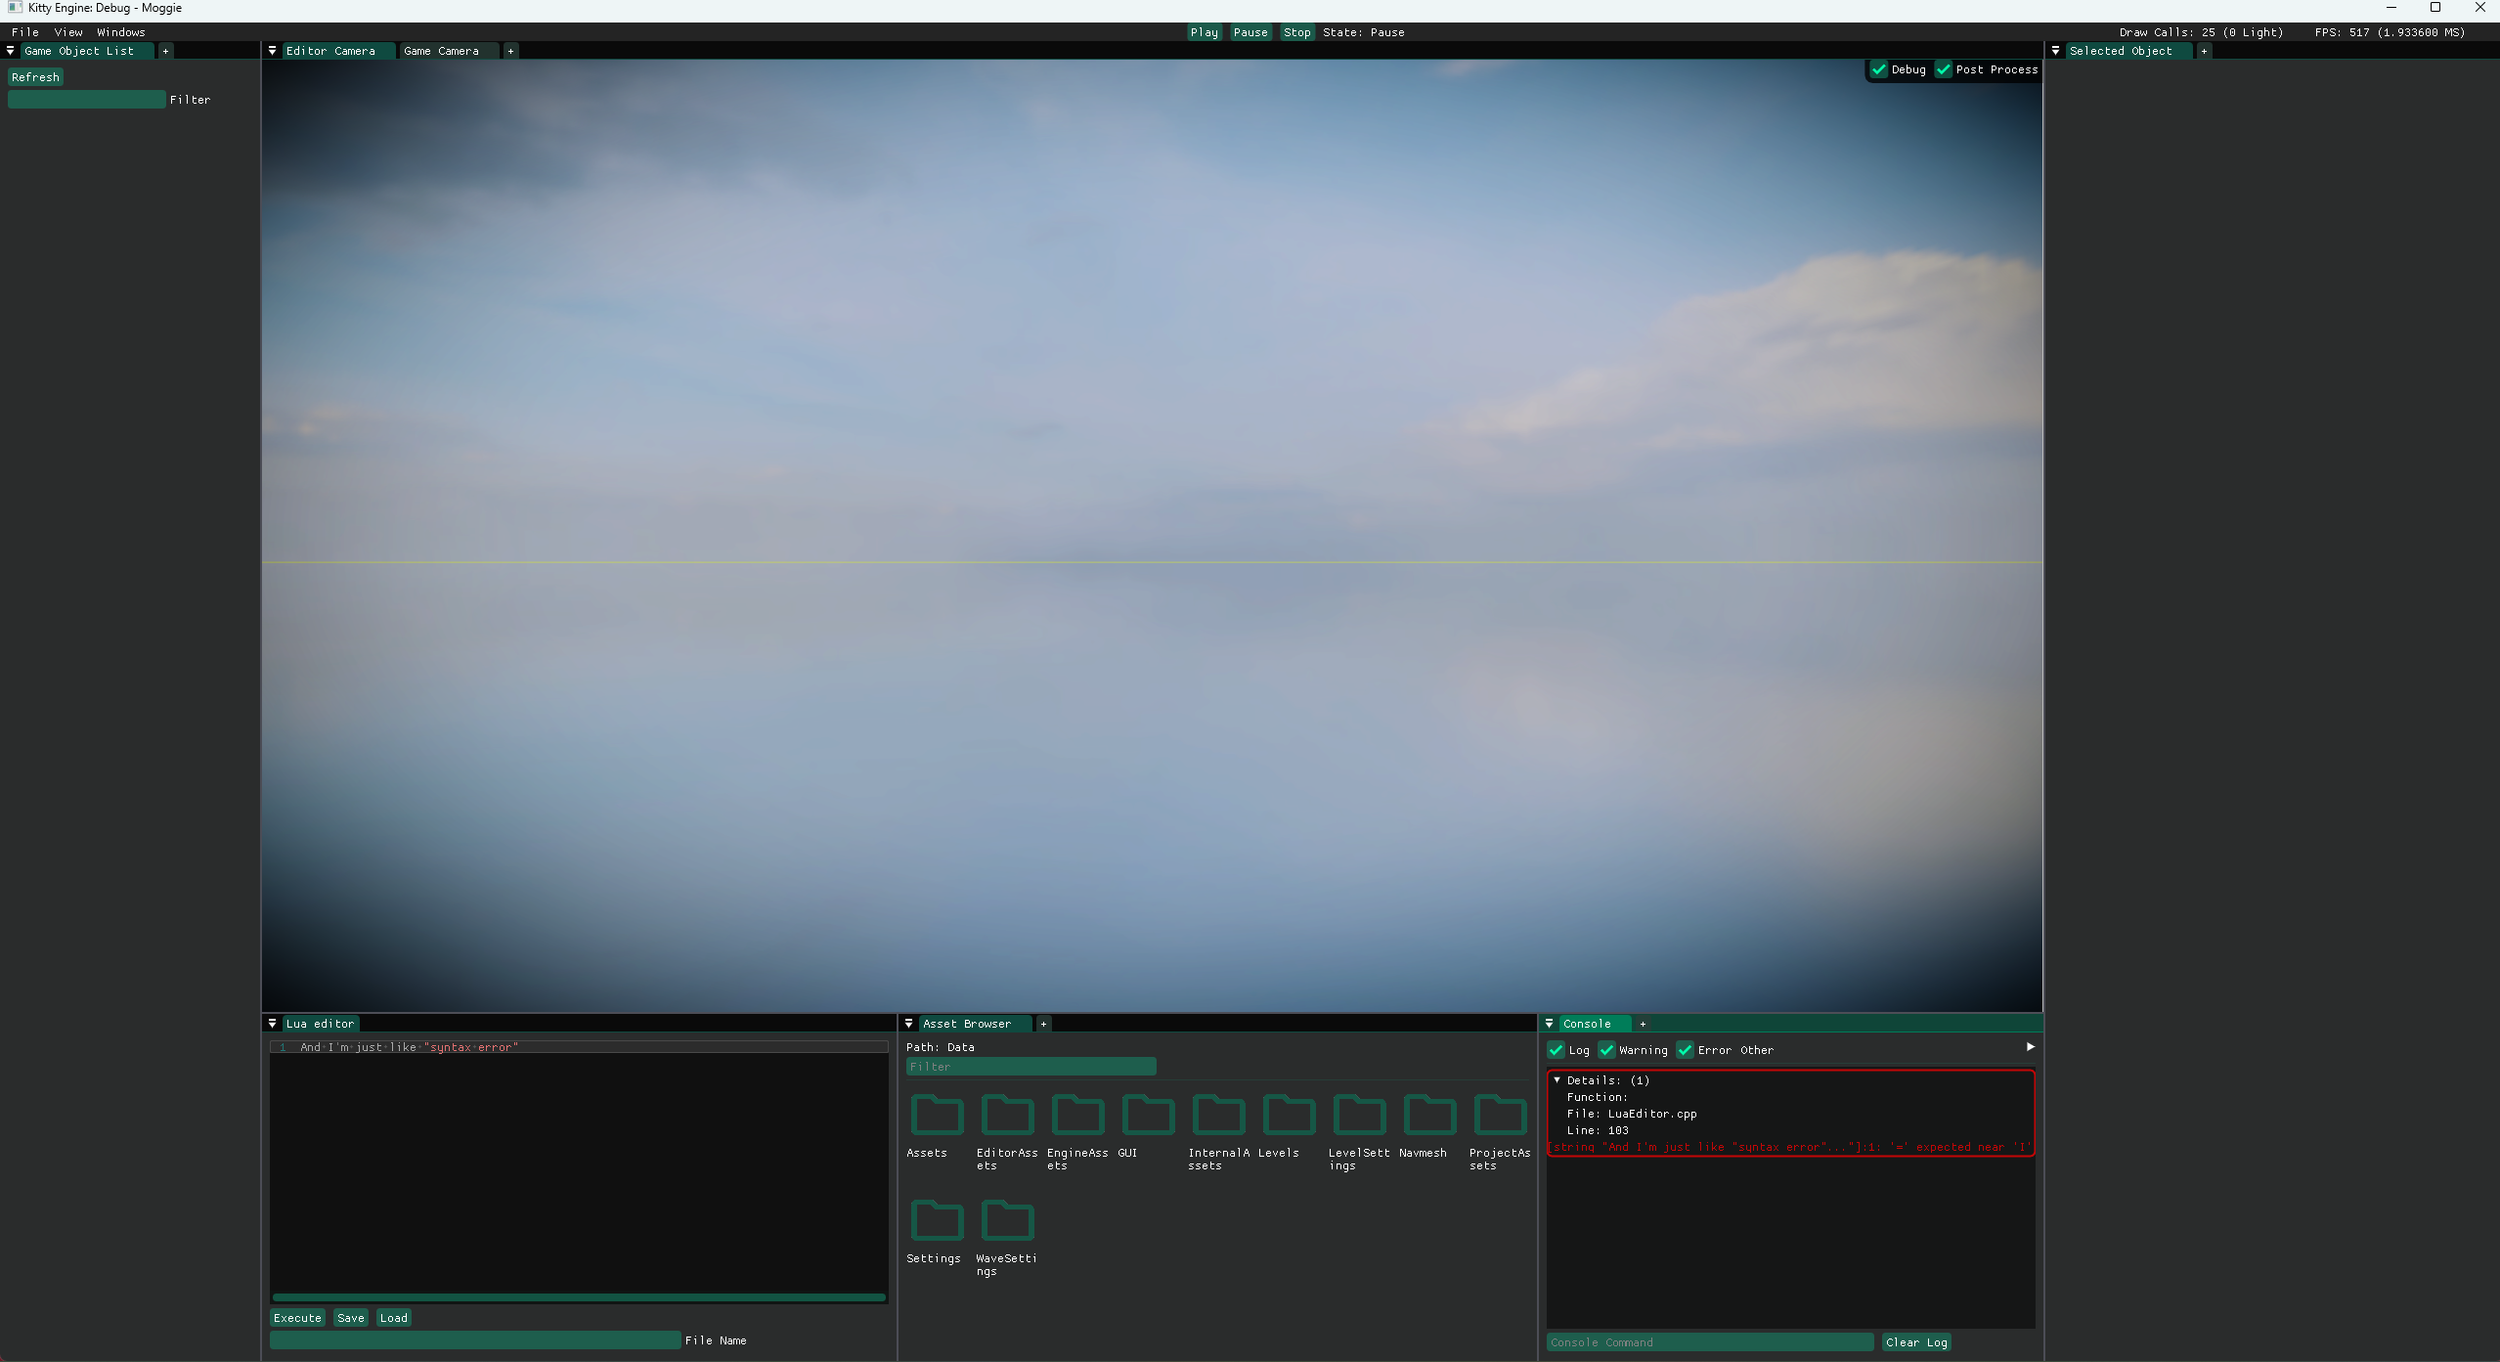
Step 5: Error handling
At this point we can do a few cool things with our tuple and our functions,
but developing Lua-scripts right now is still a painful process.
Granted, we now have syntax highlighting, but we still crash to desktop every time
we try to execute a Lua script with errors.
This won’t do. We’re expecting errors while we’re writing scripts, right?
We need to implement error handling that can tell us what error was encountered,
and also recover gracefully.
Luckily, Sol has not only an elegant way of integrating custom error handlers,
the documentation page gives an almost perfect implementation for our purposes, so I
copied over that implementation.

Step 6: Lua script components
We now have a proper editor and the means to develop and execute Lua scripts comfortably.
However, all scripts exist only in the Lua editor, which comes with a bunch of shortcomings.
Firstly, the Lua editor lives and dies with the Kitty Engine Editor, and we can only run Lua from the
Lua editor as of yet, so any release build would not be able to run Lua.
Secondly, there is no established hierarchy and no well defined architecture here.
Everything just gets ran from this monolithic editor.
The solution to this is to add script components to our component system.
This would be somewhat similar to how e.g. Unity does things, wherein C# scripts exists on
game objects, and can access their parent.
Here’s the header and the translation unit of the final implementation:

As you can see, the script component is not overly complicated.
The interface provided in the header is mandated by all components, but we are mostly
interested in the methods: SetData, Awake and Update.
SetData is ran by the importer when we read in our game objects and their respective
components from Json.
All it does in this case is deserialize a script from the scripts folder among our assets.
Awake is ran once when we load a given scene, and here we open Lua’s base library aswell as all of
the functions, usertypes and constant variables (e.g. keycodes) defined in our scripting API (more on this later).
Update is ran once per component per game object per frame, so each frame we
also update all mutating variables accessible through Lua (e.g. delta time), and then we run
the script assigned to this component, with error handling of course.
The benefit of this architecture is that scripts can belong to game objects like any other component,
and due to the nature of our component system, the scripts are hot-reloadable aswell.
This means that you can edit your Lua script (either externally or with the editor we built, whichever you prefer),
save it, hit stop and then start again, and the scripts will reload completely, without having to wait for long compile times.
This allows for rapid developing and testing of gameplay code.
Step 7: The scripting API
By far the biggest piece on this board, the scripting API defines what is accessible in Lua.
This means that all components, user-defined types, functions, methods, non-Lua variables etc. must
be registered and maintained by the API.
The header is rather simple.
It just consists of two functions wrapped in a suitable namespace, and internal forward declarations of their parameter’s types:

The translation unit is where it gets interesting though:
The scripting API is by far the biggest piece of code needed in this portfolio project,
and this is an extremely modest API as of yet.
It doesn’t feature that much to be honest, but it does feature enough functionality
to develop a simple player controller with animations, as we’ll see.
All together now:
Enough exposition, let’s see some results!
Here is the script for a simple player controller using our scripting API:
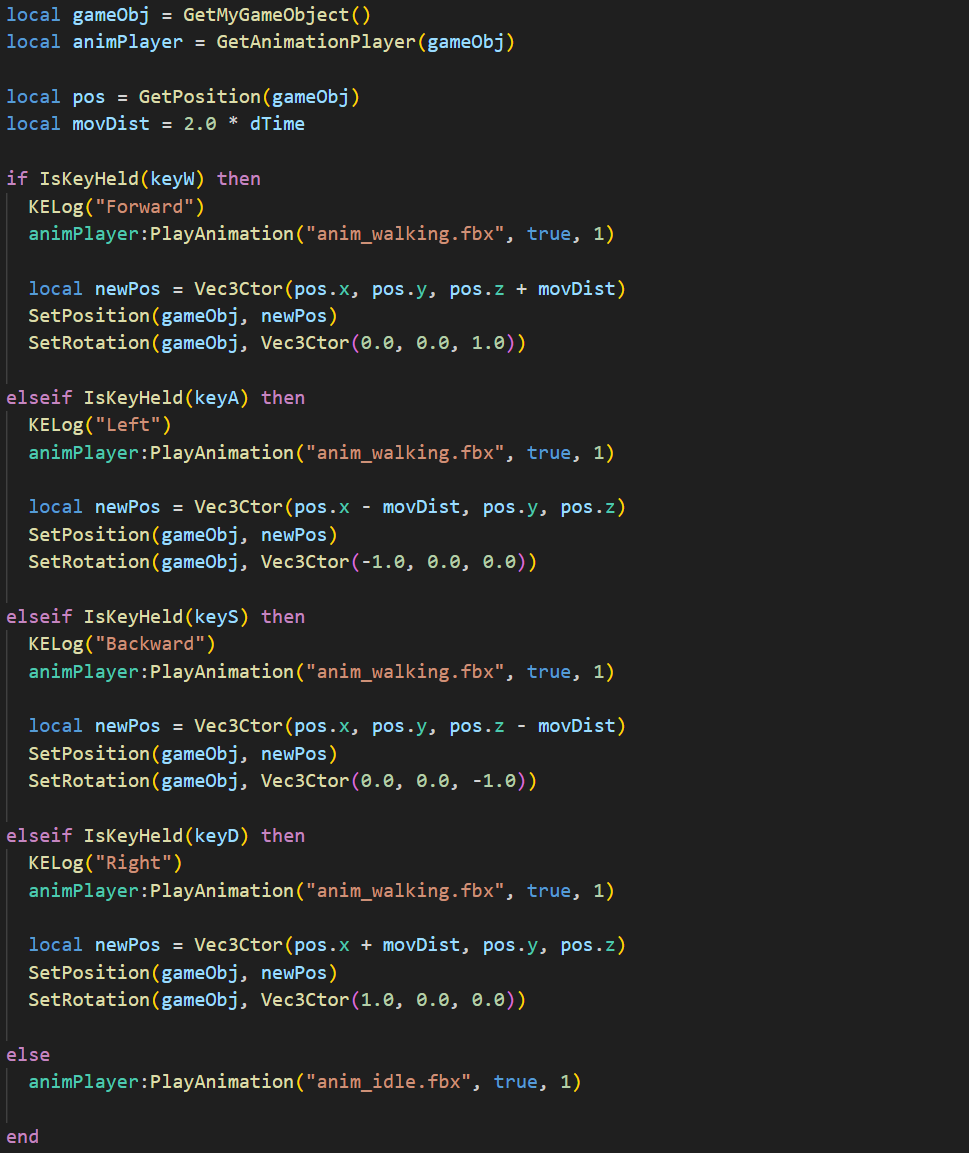
And here is the result:
Of course, this is by no means a good player controller, it is about as
bare-bones as you can get.
Still, I hope it illustrates the versatility of the script component and scripting API.
Because of the framework we’ve established, we just need to expand the scripting API
with new functionality, and we’ve already seen how easy Sol makes that part.
And that’s the plan going forward;
In time, Kitty Engine will feature a mature and versatile scripting API.
Thank you for following the abridged version of this journey with me,
it’s been an absolute blast.
-Vilhelm